I am delighted to welcome you to another tutorial. This time, we will explore how to activate a 3-day Free Trial on Cloudways and launch your website in just 7 minutes. The guide is presented in a step-by-step format, ensuring you can grasp the entire concept quickly and easily.

Discover the Best Cloud Hosting in India with a 3-day free trial. Sign up now and enjoy a 20% discount for the first month using our exclusive website promo code ‘TRENDSLE20‘.
Let’s get started! First, sign up for your account using your email address. It’s entirely free and doesn’t require any valid credit card details. If you’re satisfied with your Cloudways hosting, you can upgrade your account later. Please note that this plan is valid for only 3 days. To continue beyond the free trial period, you’ll need to upgrade your account before it ends.
Are you unsure about how to go through the account sign-up process? Please refer to our Cloudways promo code tutorial, where I have explained everything in detail. After completing the sign-up process, the system will prompt you to verify your account.
If you are uncertain about how to verify your Cloudways account, click on the link and read our step-by-step guide. Once the verification is complete, the next step is to deploy our WordPress/Server.
Activate Cloudways Free Trial Setup
Follow the steps and start doing the same thing.
Deploy Cloudways Server/WordPress – Step-by-Step Guide
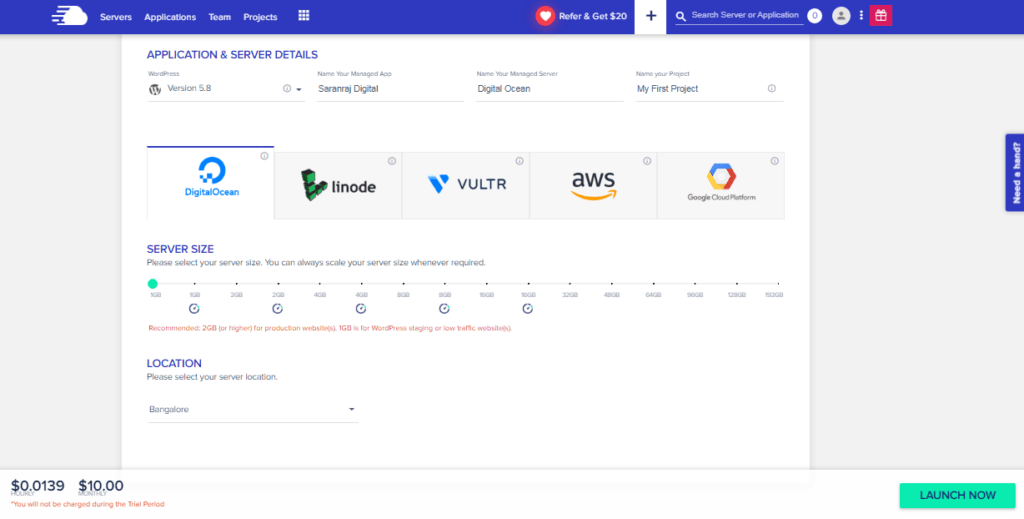
In this section, we will explore how to deploy WordPress and servers simultaneously. It is a straightforward process that won’t take you more than 7 minutes. After completing your Cloudways verification, your final dashboard will resemble the image below:

Now, we need to fill in the basic details to deploy the server.
- WordPress Version: 6.4.2 as of January 2024
- Name Your Managed App: Saranraj Digital (As you wish)
- Name Your Server: Digital Ocean (As you wish)
- Name Your Project: My First Project (As you wish)
- Location: Bangalore – I am from India and want to target only Indian people, so I chose Bangalore.
Once you have filled in all the details, click the launch button. It will take…
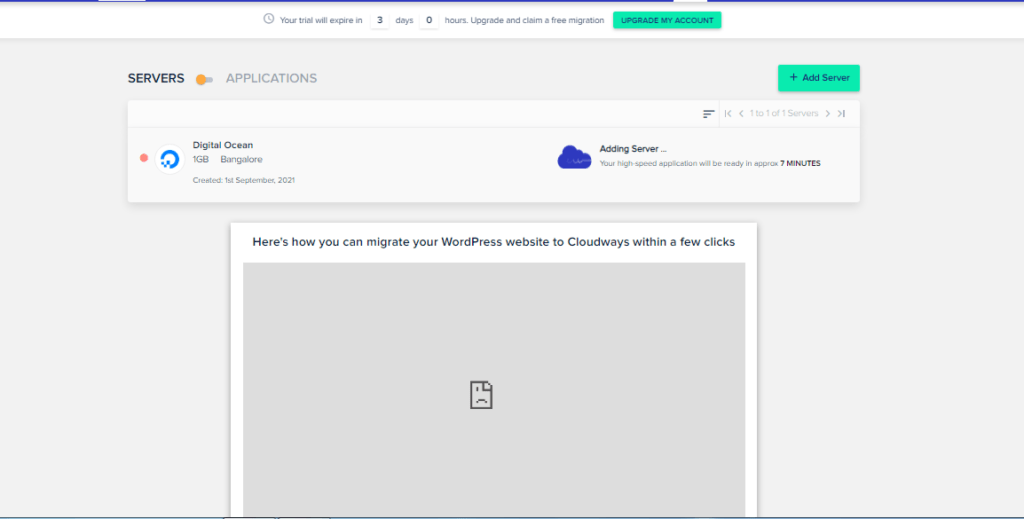
In the next step, you need to click the Digital Ocean icon to open your server dashboard. From the dashboard, you can access your WordPress login, website domain connectivity, and everything.
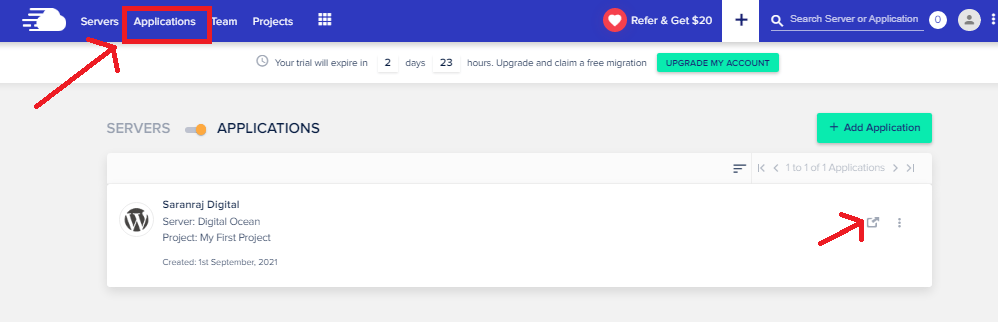
Now, you can access the website URL of your domain by clicking the application icon in just one click.
Point your CLoudways DNS Address to Domain Registrar
There are two ways you can point your IP address: either through your domain registrar or via Cloudflare. I will guide you through both methods.
Domain Registrar
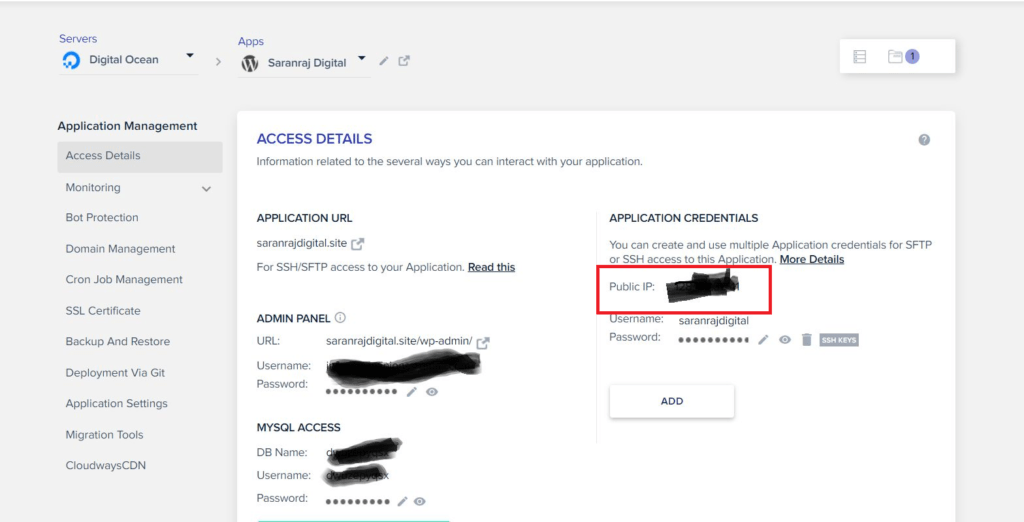
To point your domain’s IP address with a domain registrar, you need to obtain your Cloudways IP address first. You can find your IP address in the Access Details section. Retrieve your IP address and enter it in your domain name registrar.
To do this, open your domain name registrar; in this case, Hostinger is my domain name registrar.
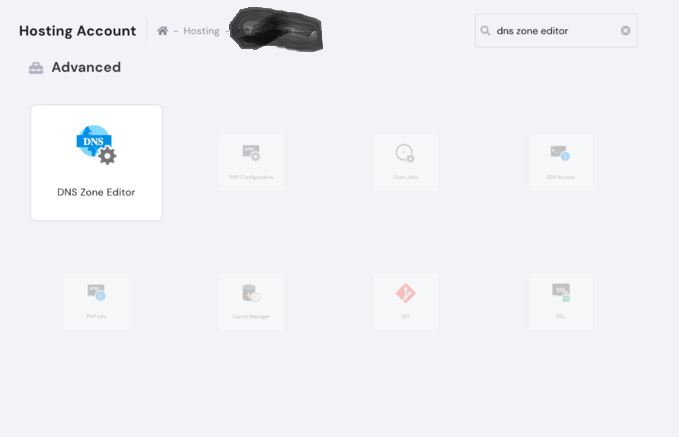
For Hostinger clients, access the DNS Zone Editor by navigating to HPanel -> Hosting Account -> Advanced.
Type ‘DNS Zone Editor’ in the search box.
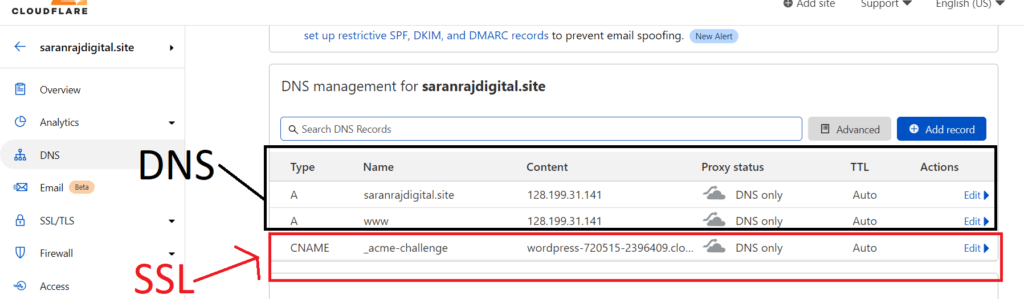
Choose Record Type A and Enter the following record
- Type A, Name – @, Value = Your Ip Adress(Cloudways Ip Address) TTL -14400(default) – Which will point to your website root domain
- Type A, Name -www Value = Your Ip Adress TTL -14400 – It will point to your website name which starts with www. You can do the same thing for the subdomain by following this how-to manage DNS record article.
Once you have completed the A record, it may take up to 24 hours to propagate worldwide. In the meantime, you can proceed with other setups such as SSL installation, adding the domain to domain management, and more.
CLoudways IP Address – Cloudflare
The steps are the same for both procedures. I will attach a screenshot for your reference. Simply add the DNS as shown below. Additionally, you can include a CName record to connect the SSL certificate.
Adding Domain Name
Visit the domain management in the Apps section and enter your domain name in the empty column. As shown in the image below:
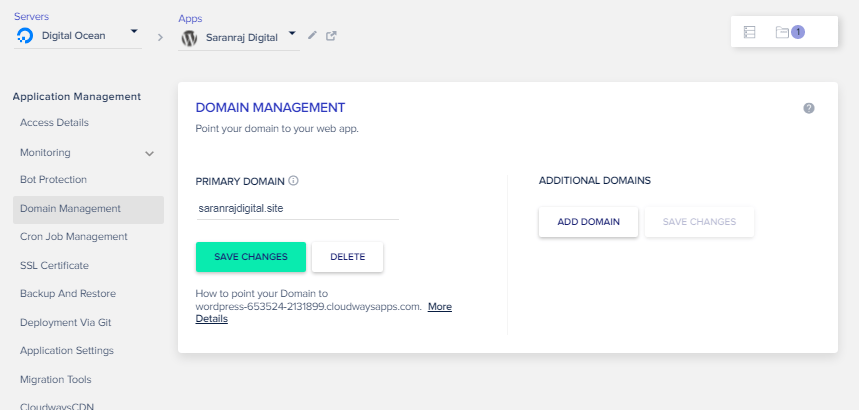
It’s entirely up to you whether to choose with ‘www’ or without ‘www.’ I prefer using without ‘www,’ as you can see from my current website address in the image below.

SSL Installation
Cloudways offers a free SSL certificate, and you can install it by accessing the SSL Certificate section.
Navigate to Server -> SSL Certificate, and enter your domain and email address. Simply follow the instructions provided in the image and click ‘Install HTTPS.
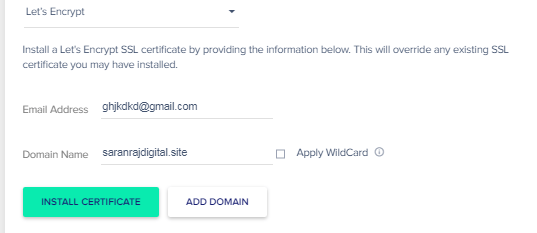
Once you click ‘Install Certificate,’ it will prompt you to enter the CName record on your domain registrar or Cloudflare. Follow the steps mentioned in the DNS connection section. If you have any doubts, please reach out to Cloudways support for assistance.
Website Migration
The next step is to migrate the website from your old host to the new host. With Cloudways’ free trial, you can avail website migration for free. To utilize the free migration option, you need to upgrade your account to the paid version.
Upon upgrading to the paid version, they will handle everything for free. Simply request them to migrate your website.
Shared Hosting:
- Cpanel Access.
- File Manager.
- Very few chances for mistakes.
Cloud Hosting:
- No Cpanel Access – You can upload files only through FTP. I use Filezilla for file transfer. If you want to unzip or compress files, you should either use PHP code or the Terminal. Handling tasks in the Terminal requires more technical knowledge.
- Significantly faster compared to shared hosting, and it’s also cost-effective.
What do you have to do in 3 Days Free Trial?
What do you need to do during the 3-Day Free Trial? In this section, I will guide you on what tasks to focus on during the three-day free trial, primarily related to website performance.
- Check your website speed.
- Monitor downtime.
- Evaluate uptime.
- Measure loading time.
- Calculate average loading time.
- Assess customer support.
These are the tasks you should prioritize during the three-day trial period. While three days may not be sufficient to fully understand website performance, it will provide you with a basic idea of how your website has performed over this period.
Use Tools Like, Google Page Speed, GtMetrix, and Pingdom. To check website uptime and downtime use Uptimerobot.
If you’re satisfied upgrade to the paid version. If you’re not satisfied try another hosting server. But I’m sure you will love this hosting.
Then you can install the WordPress theme and I prefer using the Generate Press theme. For website optimization please check out the Optimization Guide. Also, check out How to Start a blog for more clarification. I
Cloudways Feature
Cloudways offers a lot of features, you can use those features to optimize your server performance.
Here are some feature
- Monitoring service. Here you can able to monitor PHP and MySQL performance. Disk Usage and Running Crons etc.
- Back-Up and Restore
- Migration Tools
- Cloudways CDN – Free CDN
- and many more.
Cloudways is one of the best cloud hosting companies in India and all over the world. I am sure you may love the service. Let’s give it a try. Click the Cloudways Free Trial Activation and Launch your first website.
Conclusion
Cloudways is a hosting company that offers a three-day free trial. The activation process for Cloudways’ free trial is straightforward, taking no more than 10 minutes.
During the three-day trial, it is completely free, and you are not required to enter your credit card details. If you are new to cloud hosting, simply choose Digital Ocean as your server, costing only $10 per month.
The basic plan includes 1 Core, 1GB of RAM, 25GB SSD, and 1TB Bandwidth. In my experience, 1TB bandwidth is more than enough to handle over 1 million visitors per month.
So, what are you waiting for? Just click the link below and get started.
FAQ
What is the trial period for Cloudways?
Cloudways offers 3 3-day trial period you can able to activate the trial without entering credit card details.
Author, Blogger, Entrepreneur, and Founder of TrendsLearner.com.
With over 5 years of experience in the fields of Search Engine Optimization, Keyword Research, SEM, Social Media Marketing, Email Marketing, and WordPress Website Creation, I am passionate about driving digital success. My mantra is: “Work hard in Silence, let the success make the noise.”
Contact me at saranrajseo@gmail.com